
Cash Drawer Trigger – Troubleshooting
This guide covers common issues across models like AT10PB, AT10U3, AT10ME, AT10M3, and AT10M3-S. Learn how to test functionality, resolve power-related shutdowns, fix open/close detection errors, and interpret LED indicators for smooth POS integration.

AT10PB AT10U3 AT10ME AT10M3 AT10M3-S
AT10PB Push Button Cash Drawer Trigger
Why the AT10PB always shut down when using a power bank or smart power adapter?
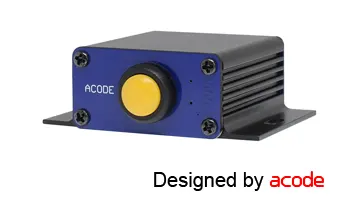
The AT10PB Cash Drawer Trigger is a low-power consumption device and draws minimal current. Some portable power banks or Smart power adapter will automatically disable output if they detect very low current — mistakenly assuming no device is connected. This may cause unexpected power shutdowns.
🛠️ Solution Options
- Signal Socket 5V DC adapter only ✔. (Multi-voltage adapters are not supported. ✘)
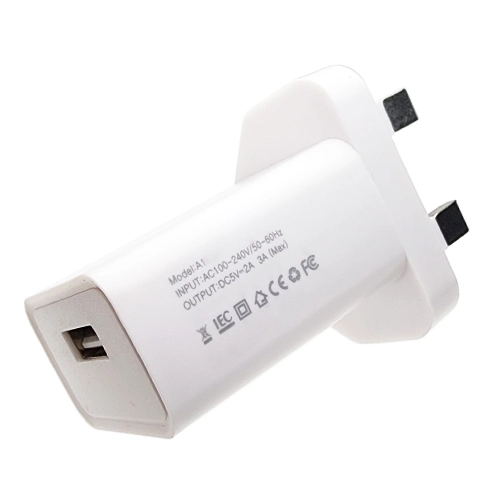
- Use a power bank with “Always-On” mode — designed to keep output active even under low current draw
- Upgrade to AT10M3 Cash Drawer Trigger :
-
AT10M3 Mobile Cash Drawer Trigger
- The AT10M3 Cash Drawer Trigger supports DC5V input, making it fully compatible with standard USB power plug and portable power banks.
- It also supports online charging, allowing continuous operation while connected to a power source — including mobile power banks.
-
We’re here to help—contact our team anytime with your questions.
AT10PB Check the equipment for proper functionality.
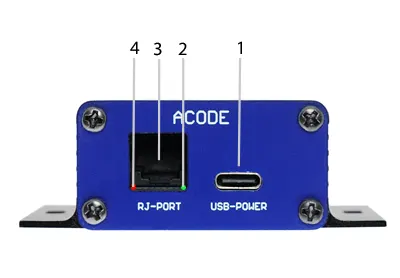
10PB LED Status Guide & Troubleshooting
A. Normal Operation
- 🟢 Green LED (2) ON: Power is connected and ready
- 🔴 Red LED (4) ON: Trigger signal is active
B. 🟢🔴 Both LEDs OFF
If neither LED is lit:
Action Steps:
- Plug in the USB power cable using a DC 5V USB power adapter
- Verify that both the USB cable and adapter are functioning properly
- If everything checks out but the LEDs remain off, the 10PB unit may be faulty → Please contact your supplier.
🟢🔴 C. Both Green & Red LEDs ON
🧪 Troubleshooting Steps:
- Disconnect the USB power cable (Port 1) and RJ cable (Port 3)
- Reconnect the USB power cable and observe LED behavior
🟢🔴 D. Red LED Behavior:
- Flashes once when button is pressed → Check the cash drawer and its cable → This test confirms drawer status; an open drawer may trigger the flash. Flashes once when the button is pressed again; the USB power cable needs to be disconnected
- Stays solid (no flash) → Disconnect USB power for 30 seconds, then reconnect → If issue persists, the 10PB may be damaged → Please contact your supplier.
- Does not light at all → If Green LED is ON but Red LED remains OFF → Likely a hardware fault — Please contact your supplier.
🟢⚫ E. Green ON and Red OFF not start:
Fault Description After connecting the power, both the Green LED and Red LED turn on. When the button is pressed, the Red LED flashes once and then no longer lights up. AT10PB damage rate is high.
Common Causes of Failure
- Incorrect wiring connection (most frequent)
- Wrong wiring often leads to malfunction.
- Check the cash drawer and cable pinout carefully.
- Damaged connection cable (quite common)
- Internal short circuits in the cable can cause issues.
- Inspect the cable for internal shorts.
- Cash drawer controller short circuit (less frequent)
- Although rare, the controller itself may short circuit.
“Important Note: Please ensure that the cash drawer pins and cables are connected correctly before use.”
Contact our team anytime with your questions.
AT10U3 USB Cash Drawer Trigger
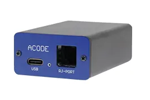
How to Set Up & Test the AT10U3 USB Cash Drawer Trigger on Windows ?
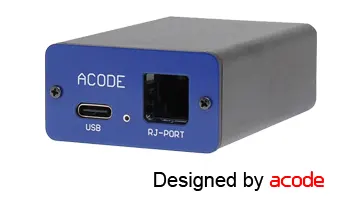
Setup & Troubleshooting Guide for USB Trigger Module
A. Hardware Connection
- Plug the USB trigger module into your PC.
- Connect the cash drawer to the trigger using an RJ11/RJ12 cable.
B. Driver Installation
- Most USB triggers require a virtual COM port driver.
- If Windows doesn’t install it automatically, download the correct driver from the .
C. COM Port Identification
- Open Device Manager → Expand Ports (COM & LPT).
- Note the COM port assigned to the USB trigger (e.g., COM3).
D. Testing Tools
- Launch the ACODE Cash Drawer & Customer Display Testing Tool.
- Alternatively, use a terminal program like PuTTY to send commands to the COM port.
E. Drawer Activation Test
Send any data to the COM port using:
- Terminal software
- POS software
- ACODE Testing Tool
If successful, the drawer should open.
F. POS Software Configuration
In your POS system settings:
- Select Serial Cash Drawer
- Choose the correct COM port
- Use the built-in test function to verify operation
G. LED Status & Troubleshooting
LED Indicators:
- 🟢 Green LED ON: Power is active
- 🔴 Red LED ON: Trigger signal is ready
If both LEDs are ON:
- Press the test button or send a command
- Observe the Red LED behavior:
| 🔴 Red LED Behavior | Action |
|---|---|
| Flashes once | Check the drawer and cable. Reconnect and retest. |
| Stays ON (no flash) | Disconnect USB for 30 seconds, then reconnect. If unresolved, unit may be damaged. |
| Does not light at all | If Green LED is ON but Red LED remains OFF, the unit likely needs repair. |
We’re here to help contact our team anytime with your questions.
AT10U3 Cash Drawer Trigger cannot detect cash drawer open/close status ?
Common Reasons & Fixes :
A. Cash Drawer Lacks a Sensor
- Not all cash drawers have built-in sensors to detect open/close status.
Solution: Confirm with the manufacturer whether your drawer supports status detection via RJ11/RJ12 pins (typically pins 3 & 6). - Trigger Model Doesn’t Support Status Detection , Please check cash drawer sensor type.
B. Incorrect Sensor Type Configuration :
Cash drawers use either:
- Normal Open (NO): Sensor circuit is open when drawer is closed.
- Normal Close (NC): Sensor circuit is closed when drawer is closed.
C. POS Software Doesn’t Poll Status :
- Your POS system must actively check the COM port for status return codes.
Solution: Integrate status polling in your POS software.
We’re here to help—contact our team anytime with your questions.
Step-by-Step Setup & Testing (Windows / Android Version)
A. Connect Cash Trigger
- Plug in the Cash Trigger to the appropriate port on your device.
B. Check Indicator Lights Under RJ-Port
- Send an open cash drawer command or pass button to test.
| LED Status | Description |
|---|---|
| 🟢 Green LED ON | Power supply is normal. |
| 🟢 Green LED OFF | No power input or the trigger may be damaged. |
| 🔴 Red LED ON | Cash drawer trigger is ready. |
| 🔴 Red LED OFF | Trigger may be damaged. |
| 🔴 Red LED lights up slowly | Normal behavior — LED becomes steady 4 seconds after being triggered. lights up over 8 seconds check power adapter. |
Step 3: Testing via Windows
- You can verify the trigger signal using the Windows COM port utility or diagnostic software.
- The test steps can check via windows TS2-0010-010 or Via Android TS2-0010-013
AT10U3 Cash Drawer Trigger Setup on Android: Step-by-Step Guide
A. Connect the Trigger
- Use an Android device with USB Type-C or OTG support.
- Plug in the USB trigger module.
- Connect the cash drawer using an RJ11/RJ12 cable.
B. Install the Terminal App
- Download and install Android Serial USB Terminal from the Play Store.
C. Send the Open Command
- Launch the Serial USB Terminal app.
- Configure it to connect to the USB trigger.
- Send a command to open the drawer.
D. LED Status & Troubleshooting
✅ Normal LED Behavior
- Green LED ON: Power is active.
- Red LED ON: Trigger is ready.
🛠️ Troubleshooting Steps
- Unplug both the USB data cable (port 1) and RJ cable (port 3).
- Reconnect the USB cable and observe the LEDs:
- Both LEDs ON:
- Green = power.
- Send command via Serial USB Terminal.
- Red LED flashes once: Check drawer and cable. Reconnect and retest.
- Red LED stays ON (no flash): Disconnect USB for 30 seconds, then retry. If unresolved, the unit may be faulty.
- Red LED does not light at all: If Green is ON but Red remains OFF, the unit likely needs repair.
- Both LEDs ON:
We’re here to help—contact our team anytime with your questions.
AT10B3 USB Cash Drawer Trigger
AT10M3 Mobile Battery Cash Drawer Trigger
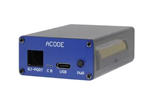
AT10M3 LED Indicator & Maintenance Guide :
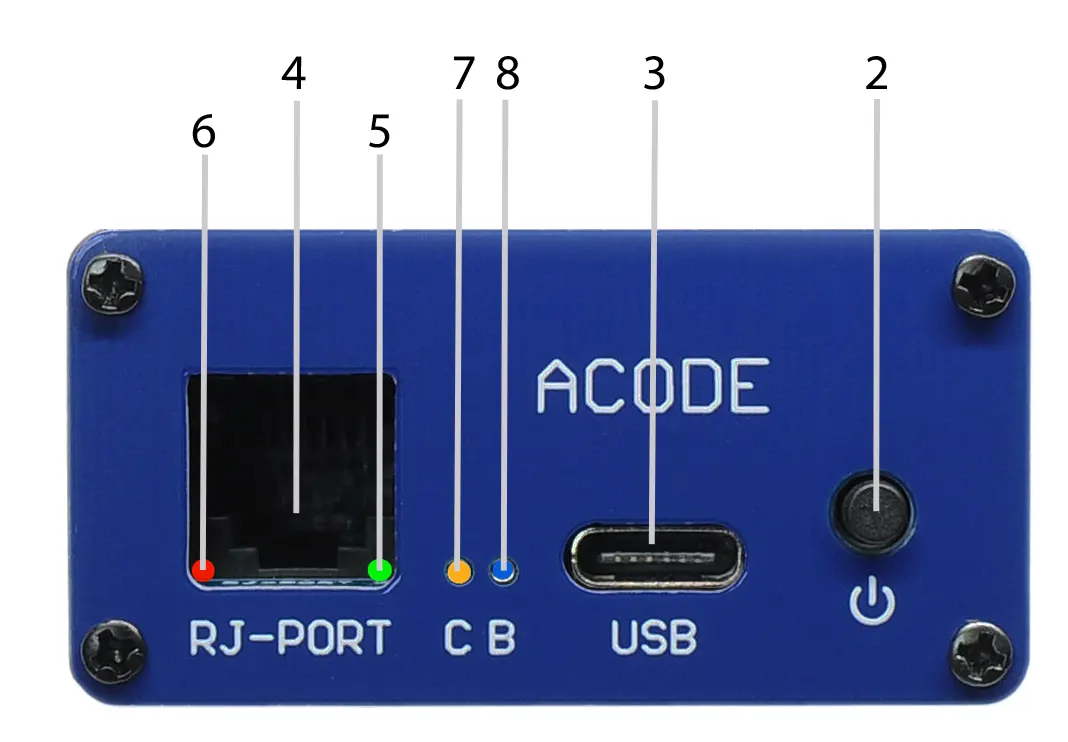
🔴 Red LED Lighting
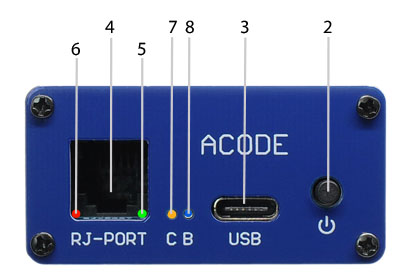
- Normal Behavior: Red LED (6) takes approximately 6–8 seconds to illuminate — this indicates standard operation.
Step-by-Step Diagnostic Checklist
🟩 A. Green LED (5) Check
- After charging the device, unplug the USB power (3)
- If the Green LED (5) appears very dim, this may indicate a weakened battery or inadequate charging.
🔴 B. Red LED (6) Lights Up Very Slowly?
- Slow illumination beyond the expected 6–8 seconds could signal power deficiency or poor battery health.
⏱️ C. Short StandbyTime?
- Reduced standby time may result from a degraded battery or insufficient charge from the power source.
🔋 D. Battery Check Refined Specification Line
- Connect via USB‑C and press the power button — a green indicator lights up, disconnect USB‑C to all light off.
- Confirm AA-14500 cell voltage is 3.7 V
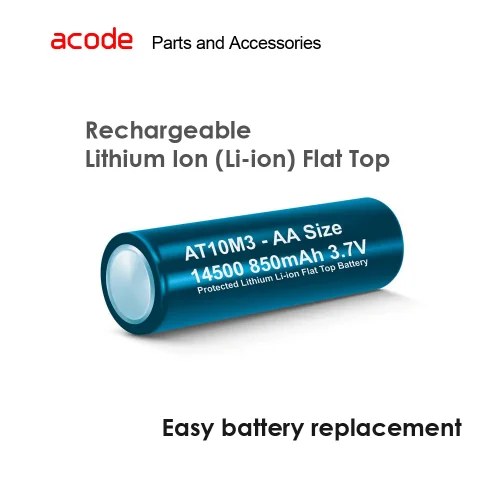
🛠️ Solution: Power Adapter & Battery Check
- ✅ Test the Power Adapter for proper function
- ✅ Charge the battery until the Yellow LED (7) turns off
- 🔍 If problems persist:
- Check the battery condition
- Ensure the power adapter delivers sufficient current
- If issues continue → Device may require maintenance
🔹 Refined Component Indicators
| Item | Indicates Light |
| 2 | Power Button |
| 3 | USB Type-C Power Socket |
| 4 | RJ11 / RJ12 Cash Drawer Connector |
| 5 | Trigger Ready — LED on Red |
| 6 | Trigger Active — LED on Green |
| 7 | Battery Charging — LED on Orange |
| 8 | Bluetooth Enabled — LED on Blue |
📘 For battery replacement instructions, refer to TS2-3030-011
A. Keep your workspace clean and tidy and free of any metal objects.
B. Unscrew the 2 screws on the back panel of the case, slide out the PCB, remove the old battery and replace it with a new one.
C. screw the 2 screws on the back panel of the case.

AT10M3-S Solar Power Cash Drawer Trigger
AT10M3-S LED Lighting & Maintenance Guide :
🔴 Red LED Behavior
- Standard Operation: Red LED (6) takes 6–8 seconds to light up after activation. This delay indicates normal function.
Step-by-Step Diagnostic Checklist
🟩 A. Green LED (5) Check
- After charging, unplug the USB power (3)
- If the Green LED (5) appears very dim, power retention may be low or battery performance is degrading.
🔴 B. Red LED (6) Lights Up Very Slowly?
- This could indicate weak power input or delayed response due to battery or solar issues.
⏱️ C. Short Standby Time?
- Standby time may be reduced if the battery doesn’t hold sufficient charge or the solar panel is underperforming.
Solution: Solar Panel & Battery Check
- ✅ Verify Solar Panel Output: DC6V / 6W
- ✅ Charge the battery until the Yellow LED (7) turns off
- 🔍 If the issue continues:
- Check the battery condition
- Confirm the power adapter current is sufficient
- If problems persist → Maintenance is required
📘 For instructions on battery replacement, refer to TS2-0030-011
AT10ME Buddy Cash Drawer Trigger
AT10ME Buddy cash drawer trigger basic testing
A. POS Printer Drawer Port Test :
- Connect the POS printer drawer port to the cash drawer using the appropriate cable.
- Test to open the cash drawer.✅ If the drawer opens, proceed to Section B.❌ If not, follow Solution 1.
B. AT10ME RJ-Port Test :
- Connect the AT10ME RJ-Port directly to the cash drawer.
- Test the open drawer function.✅ If the drawer opens, proceed to Section C.❌ If not, follow Solution 2.
we’re here to help—contact our team anytime with your questions.
C. Combined Connection Test
- Connect the AT10ME RJ-Port to the cash drawer.
- Also, connect the POS printer drawer port cable to the AT10ME PRT-IN port.
- Test both connections to open the cash drawer✅ If successful, Test is complete.❌ If the drawer does not open, follow Solution 2.
D. Testing Signal : Green 🟢LED ON and Red 🔴LED ON
- Troubleshooting Steps:
- Unplug the USB power cable (Type-C) and RJ cable (port 3)
- Reconnect the USB Data cable and observe LED status:
- If both LEDs turn on:
- Test Push Button :
-
-
-
- Unplug the USB power cable (port 1) and RJ cable (port 3)
- Reconnect the USB Type-C cable and observe LED status:
- If both LEDs turn on:
- Press the button while watching the Red LED
- 🔴 Red LED flashes once:
- Check the cash drawer and its cable
- This test is performed after reconnecting the cash drawer. The drawer may be open, which reflects the correct status
- 🔴 Red LED stays on (no flash):
- Disconnect USB power for 30 seconds and retry
- If problem persists, the unit is likely damaged — return to factory
- 🔴 Red LED does not light at all:
- If the Green LED is ON and the Red LED remains OFF, the unit may be damaged — return to factory for repair.
- If both LEDs turn on:
-
-
- Test Pos Printer Cash Drawer port open cash drawer :
-
-
- Unplug the USB power cable (port 1) and RPT RJ cable (port 3)
- Reconnect the USB Type-C cable , RPT RJ Cable and observe LED status:
- Control pos printer open cash drawer while watching the Red LED
- 🔴 Red LED flashes once:
- Check the cash drawer and its cable
- This test is performed after reconnecting the cash drawer. The drawer may be open, which reflects the correct status
- 🔴 Red LED stays on (no flash):
- Disconnect USB Type-C power cable for 30 seconds and retry
- If problem persists, the unit is likely damaged — return to factory
- 🔴 Red LED does not light at all:
- If the Green LED is ON and the Red LED remains OFF, the unit may be damaged — return to factory for repair.
-
-
Solution :
- Check POS Printer or cash drawer
- Check AT10Me to Pos printer short-link cable.
- AT10ME need maintenance.